

Planted Tidal Marsh
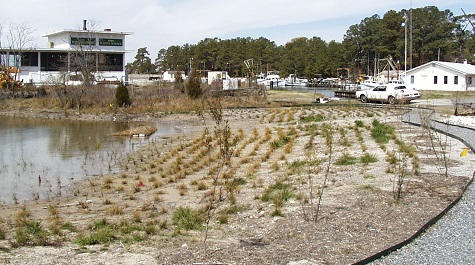 VIMS Planted Tidal Marsh - New Planting Following bank grading, a tidal marsh was planted at VIMS, note the gradual slope.
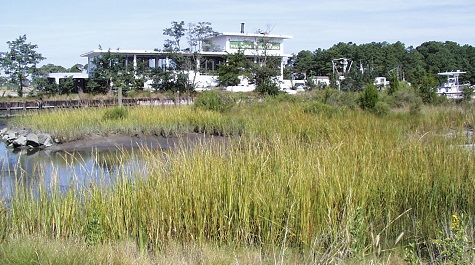 VIMS Planted Tidal Marsh - 1 Year The same VIMS marsh is well-established after the first growing season.
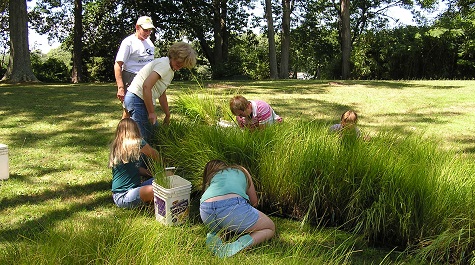 Pulling Plant Plugs Wetland plants purchased from nurseries are healthy and ready to grow. Volunteers are shown removing and separating plugs from large nursery flats to transport them to the shoreline for planting.
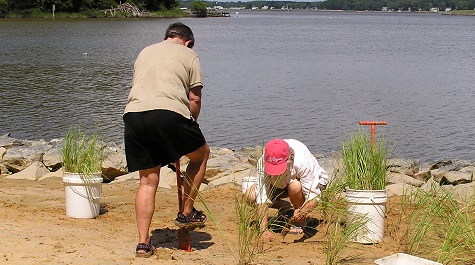 Planting Process The planting process includes pre-drilling holes then inserting a plug into each hole. It’s very important to pack the soil around each plug to remove air pockets. A small quantity of slow-release fertilizer can be placed in the hole under each plug, but this step is not essential for successful plant growth.
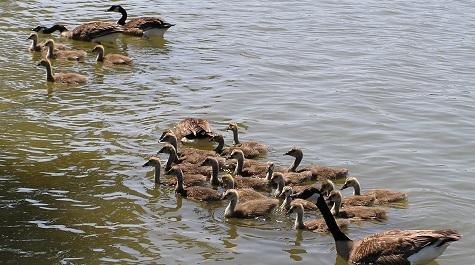 New Marsh Predators Grazing predators like Canada Geese will eat new marsh plants. If these animals are present in the project area, then temporary grazing exclusion devices should be installed right after planting.
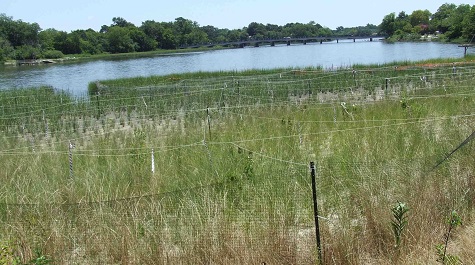 New Marsh Protection Temporary exclusion devices can include string, fences, and other barriers.
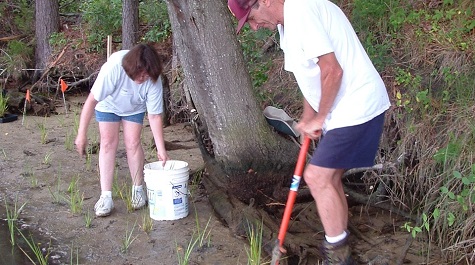 Planting in Shade Planting marshes in heavy shade is usually not successful. Removing healthy shoreline trees is not encouraged just to create suitable growing conditions for a planted marsh. Other erosion protection methods may need to be considered.
Photo - of -
If a natural marsh is absent or too narrow to prevent bank erosion, planting a new wide marsh may be possible. Upland areas with low banks can be excavated and graded to create new tidal marshes. Sand fill can be placed channelward into the water to raise the elevation, but this practice is typically not effective without some type of containment structure (see temporary growing materials and marsh sill).
Suitable Sites
- Low energy settings with minor wave action and plenty of sunlight (at least 6 hrs full sun daily)
- Gradual slopes, wide flat intertidal area
- Sandy soils, no excessive muck or clay
- Recently cleared or graded shorelines
- Previously developed or filled area that can be restored
Guidelines for Planted Marshes
- Planted marsh width > 15 feet, including low marsh and high marsh zones
- If upland will be excavated, test soil conditions at target grade
- Only clean sand fill should be used to raise elevation of planting area, topsoil and other soil amendments are not necessary for planted tidal marshes
- Create suitable slope and elevation for each zone, with positive drainage at low tide
- low marsh 8 – 10 : 1
- high marsh 3 – 8 : 1
- Monitor actual tide levels before planting
- Choose wetland plant species based on local salinity and available planting zones
- Plant spacing depends on the area to be covered and available labor. Tidal marsh plants can be arranged in rows or in random clusters
- 18 inches apart for average conditions
- 12 inches apart for rapid cover
- 2 feet apart for large areas
- Cluster arrangement
- Securely pack around each plug, remove air pockets
- Mix low marsh and high marsh species for 2-3 rows where zones meet
- Plant above and below predicted planting zone levels
- Keep grazing predators out of planted area until marsh is well-established